Tuesday, September 29, 2009

Beef Stroganoff

Difficulty Rating:

I've got an investor! Squee!

My friend Dave has agreed to bankroll a few of my cooking projects so long as he gets to eat them, and this is a totally okay solution for me. As such, you now have a delicious Beef Stroganoff recipe thanks to his generosity. He also brought over a copy of the first disc of Firefly, which has disappeared from my house. Dave is totally the man.

Now, the only reason this is a 3 Cookie instead of a 2 Cookie is because I use Tony Chachere's, and that might not be available everywhere so I'm offering a substitute. If you can get Tony's you damn well should have some in your kitchen. It is the most awesomest of spices known to man. Screw Emeril - yes, I said it, screw Emeril. He got nothin' on Tony.

Recipe

2 lb ground beef
1 1/2 tbls salt
2 tbls pepper
2 tbls Tony Chachere's
3 tbls olive oil
1 small or medium onion, chopped
3 c. sliced white mushrooms
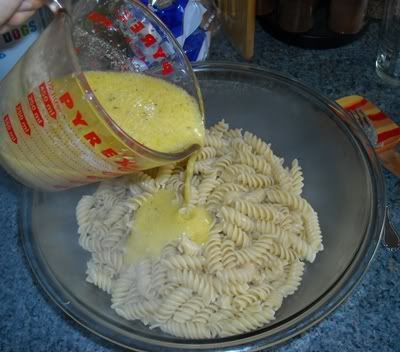
1 lb egg noodles, cooked
4 cans of beef broth at 14 1/2 oz each
1 1/4 c. sour cream
chopped garlic
a few tablespoons of SR flour

Substitution:
Every geographic area has its own local spicy goodness. Tony's is the Louisiana version. You can substitute with Zatarain's, Old Bay, or even Adobo if you add some cayenne pepper to it.

Heat oil over medium heat. Add meat and cook until nearly browned. Drain excess oil. Add onions and cook until soft, 3-4 minutes. You may need to add a little bit of broth (appx. 1/4 c) just to keep enough liquid in the pan to keep the meat from burning to the bottom.

Add mushrooms and garlic and cook until mushrooms release their juices. Add noodles, 6 cups of beef broth (a little more than three cans), and sour cream. Cook 5-10 min until thickened. If it isn't as thick as you'd like, use a fork to combine the remaining broth with two large spoonfuls of flour; add this to the stroganoff and stir well, cook another 5-10 minutes.

Execution

This recipe is fairly easy - you only need two pots, and the measurements are pretty much just about eyeing it and adding what you think you need. This is definitely one of those recipes that you'll adjust based on how you like it. I actually scribbled down a few changes in my recipe book just because of how I made it last night; the original recipe called for less beef and less sour cream, which, um, it's stroganoff, bitches. Gimmie more sour cream and beef!

The point is, play around with it. You won't mess it up unless you just accidentally dump half a pound of salt in it.
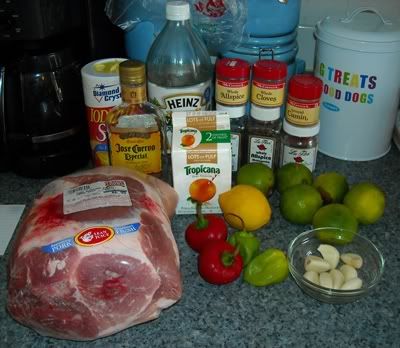
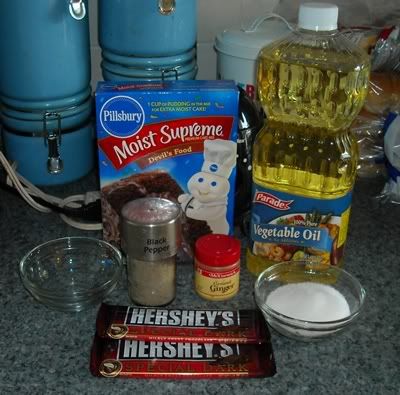
Ingredients:


I know my mushrooms are a little scuzzy, they were in the fridge for too long.

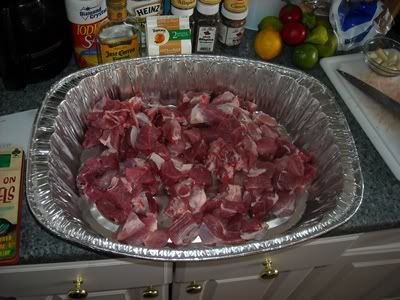
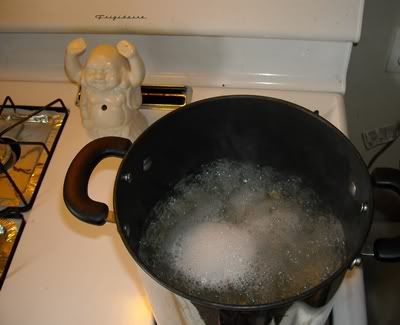
The first rule of this dish is prepping your food. Go ahead and chop all your garlic and mushrooms and the onion. Cook the noodles. Mix the meat and spices. Once everything's prepped, it'll literally just be a matter of throwing it in the pot in the correct order. Easy-peasy, as my gramma used to say.

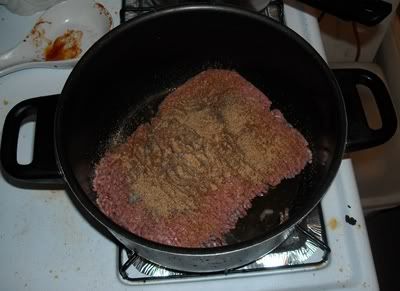
I didn't really prep because it's mid-terms week and I've spent every available moment either studying or playing Fable II to distract my brain into working after I've burnt it out with studying. So I didn't mix the spices into the meat beforehand, I just dumped them on top. And that's fine too. :)

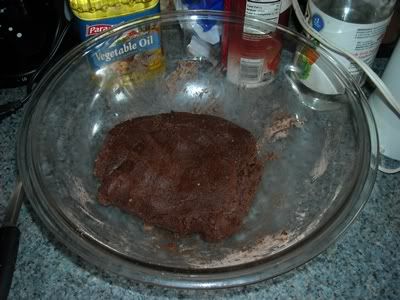
So! Heat the oil, dump in the meat and spices.


My spoon-holder is covered in spaghetti sauce because I made bolognase, which I forgot to take pictures of.

Cook it until it's mostly brown, but still has some pink in it. This'll keep it from burning in the subsequent cooking. Drain off the oil.

A quick note on draining oil - don't ever pour that crap down your sink. Yeah, sure, you can run the hot water and it'll probably stay liquid long enough to make it down your pipes, but it'll still run the chance of coating your pipes and eventually clogging the whole thing up. I use my gramma's old trick of an empty coffee can. Label the lid "Used Oil" or something, and then every time you need to drain your oil, put it in the coffee can and then freeze it. This will keep the oil out of the way, and once it's full you can just throw it in the trash without having to worry about it leaking or clogging or anything else.

Once you've drained the oil, add in the onions and cook those down too.


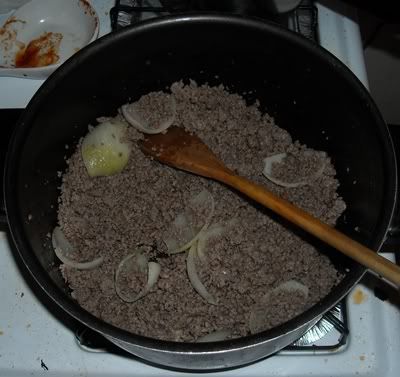
You should chop up the onions properly - I don't because my roommate is allergic to onions and they need to be big enough for him to pick out. That's why most of my recipes don't actually involve onions, but if you're a huge fan you can add 'em in wherever you want.

Keep an eye on the meat. If it starts to stick or burn to the bottom, open up one of the cans of broth and add a little bit. The recipe only calls for 6 cups, which is about 3 cans and a few tablespoons from the fourth, which means you've got some extra to work with if you need it.

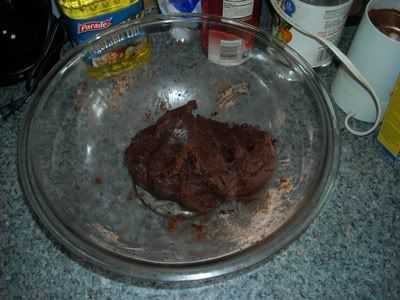
Once the onions are softened, add in the garlic and mushrooms. Mmmm, mushrooms.


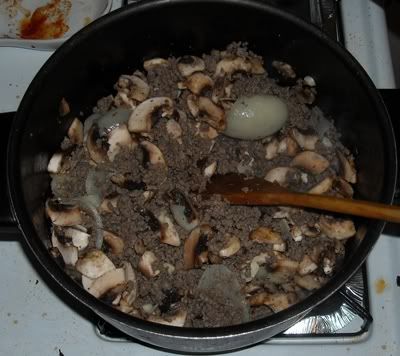
Cook that until the mushrooms "release their juices," which just sounds like a bad line from a Harlequin novel. It's pretty easy to tell: the mushrooms go from looking all dry and spongy to looking all juicy and delicious. Nummy!

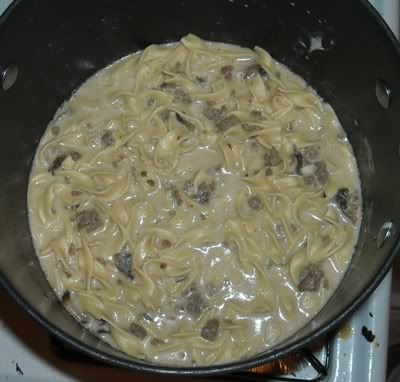
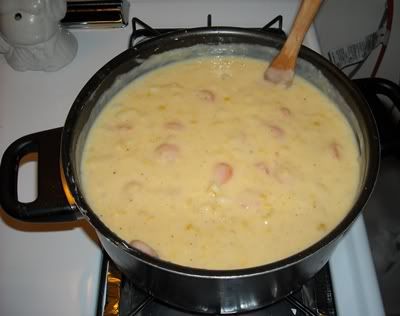
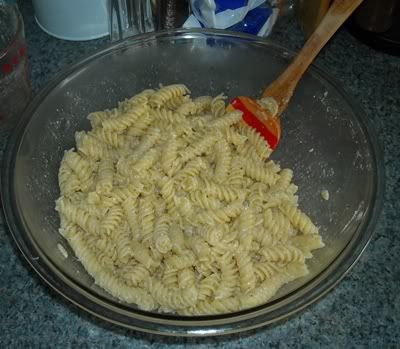
Now you just dump everything else in - 6 cups of broth, the pound of egg noodles, and the sour cream. Mix it all together and let it cook for a few minutes.

It could very well be done now, depending on how you like it. Some people prefer their stroganoff to be more like a soup, but I like mine really thick. If you want to thicken it, take a few heaping spoonfuls of flour and dump it into the last can of broth, which should be about half-full if you're following my recipe exactly. Use a fork to whisk the flour into the broth, and try not to leave any lumps. It won't look particularly thick, but just pour it into the stroganoff and mix well. If you cook that for another ten minutes it should thicken right up.


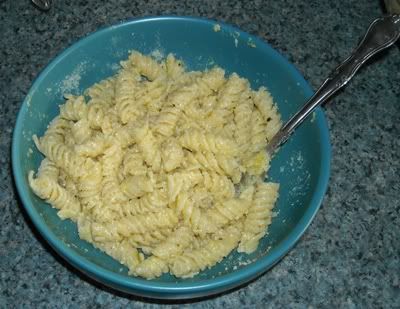
Ohmigod so good. I like to eat all the noodles and beef, and then use bread to sop up what's left in the bowl. Sooooo good!

Wednesday, September 23, 2009

Puerco Pibil

Difficulty Rating:

I will start out by apologizing for some of the picture-fail that came out of this recipe. It is my first 4-Cookie Recipe, and as such it's a bit more complicated, with several steps to it. Plus I habenero-ed myself pretty severely, and my camera froze twice. So... yeah, there's like two pictures missing of the final product. But I'll explain 'em really well, I promise!

Anyone who's seen Once Upon A Time In Mexico knows puerco pibil. I first learned how to make the dish from watching Robert Rodriguez' video about it, but since then I've adjusted the recipe a bit so I hope you enjoy!

Recipe

5 tbls. Annato seeds (sometimes sold as Achiote)
8 All-spice seeds
1/2 tsp. whole cloves
1 tbls. whole black pepper corns
2 tsp. ground cumin
1/2 c. orange juice
1/2 c. white vinegar
2 habenero peppers
2 tbls. salt
8 cloves of garlic
1 lemon
6 limes
2 tblsp. brown sugar
1 shot of tequila
5 lbs. pork butt

Hardware needed:
Extra-large baking pan
Aluminum foil
Coffee grinder
Blender
Large freezer bag

Put annato, all-spice, cloves, and black pepper in the grinder and grind until powdered. Add cumin and set aside.

Remove veins and seeds from peppers and chop up. WASH HANDS! Add the peppers to the blender along with the orange juice and vinegar. Add the ground spices, salt, sugar, and garlic. Blend until smooth. Juice the lemon and limes into the blender and add the tequila. Blend until well mixed.

Chop the pork into 2-inch squares. Put the meat in a large freezer bag and pour the blended mixture over the meat. Close the bag and squish to distribute. Place this in the refridgerator for 4-6 hours, turning every half-hour to hour to redistribute the spices.

Place meat in extra-large baking dish and cover with foil. Cook at 325 degrees for four hours. Serve over rice.

Execution

If this wasn't so damned delicious it would just be torture. This is not a hard recipe, but it is grueling and takes all day. But I do like to do this when I'm having a party and want something that I can set out buffet-style for people to eat.

Ingredients:


Now, if you'll notice there next to the garlic I have two different kinds of peppers - red ones and green ones. The green ones are the habeneros, which are what the recipe calls for. However, you can't always find them in your local grocery store (I wasn't even sure these were habeneros since they're usually orange or red, but apparently these just weren't quite ripe enough) so you can substitute with equal an equal amount of scotch bonnets.

Also note that although the container on the counter says "Dog treats for good dogs," I do not actually have a dog. I have a cat named Captain Dog, who is always good. Mainly because he's always sleeping. Like this:


He's very lazy.

So! First thing's first - you're probably going to have to de-bone your pork. Pork butt, by the way, is not actually the butt of the pig. It's the shoulder. So if you go to the store and see no pork butt, only pork shoulder... you know, buy it. It's the same thing.

Don't cut all the fat out since that's what makes it juicy and yummy. If it's got skin on it, though, get rid of that. I usually buy a 7 lb. pork shoulder so it yields about 5 lbs. of meat. You can just keep it in the roasting pan while you do the rest of your deeds. Also, I lost the picture of the meat in the roasting pan, so here's what it looks like pre-cooking and you can just imagine it all cooked and stuff:


I always buy the throw-away aluminum ones because this gets kind of gross otherwise.

Next comes the spices! If you're like me and you occasionally grind your own spices for recipes, make sure you have a grinder that's specifically for spices. You can use a regular old coffee grinder, which runs about ten bucks at the cheap places, but DO NOT, for the love of little apples, ever use the spice grinder to grind coffee. The cross-contamination, it is dreadful to the tastebuds.


The original recipe calls for grinding up your own cumin too, but I've searched and searched and never found cumin seeds available for sale, so I just use ground cumin and throw it in with the rest once I've ground them all up.

Once you've got that done, set it aside and prepare yourself for the habeneros.

WEAR GLOVES.

I really don't know what to say other than that. Most people say you can just wash your hands immediately afterwards and be fine. But some people (like me, which I discovered this weekend) have a serious reaction to the capsaicin, which is the chemical that makes the pepper spicy. This might, say, make your hand feel like it's on fire for about ten hours after you chop up the pepper, even though you washed your hands six times. You might even spend all day with your hand in a bowl of baking soda and ice water wishing for death. Let's just say that wearing gloves is a safe bet.

What I will do for delicious food, my darlings.

Cut it open, remove all seeds and veins (the inside connecting parts and anything NOT the same color and texture as the fleshy middle).


Then you just chop it up into tiny little pieces.


Then wash everything that ever touched it.

Next dump those spicy little suckers into the blender, along with the orange juice, vinegar, spices, salt, sugar, and garlic. Bleeeeend.


Put the cover on! You don't want this all over your counters! Now blend. Yesss.

Juice the lemon and limes (the original recipe called only for 5 lemons, but I prefer it with limes) and add that and the tequila to the mix.


Now, dump all that raw meat into a large freezer bag, pour that gooey red mess on top, close it up and squish it all around. Stick it in the fridge and let it soak for a while. Soak-soak-soak. Every now and then just squish it around some more so it gets in all the meat. I say leave it about 4-6 hours. The good thing about this recipe is that you can do this the night before, and then when you wake up you're all ready for cooking.

Once that's done, just dump it back into the aluminum pan, spreading it out evenly so it can all cook. Cover with foil and stick it in the oven for about four hours. You can take it out at 3 to 3 1/2 hours, the meat will just be a little more solid. Four hours makes it more the consistency of pulled pork, where the meat just sort of shreads and falls apart. This is really just up to how you want it - if I'm throwing it over rice, I like it a bit more solid. If I'm making sandwiches, I'll cook it longer.

The cooking really is the easiest part. I'd suggest serving it over yellow rice with a bunch of very cold beers. I only had white rice in the house, so this is what it looks like:


Mmm. The cooking process and the little bit of brown sugar keeps the peppers from completely overwhelming the dish, making it spicy but still very flavorful. And you've got five freaking pounds of it, so you can feed an army or just feed yourself for a week!

And I promise you, for all my complaining I love this dish. I only make it once a year, but I eat the hell out of it when I do!

Monday, September 21, 2009

Chocolate Crackle Bitches

Difficulty Rating:

This is a recipe that I got from a friend of mine several years ago and have been obsessed with ever since. I don't remember how the name came about exactly. I think it used to be "Spicy Chocolate Crackle Bitches" but that was just too much.

No matter what you call them, these slightly spicy chocolate cookies are fantastic!

Recipe:

1 box Devil's Food Cake mix
1/3 c. vegetable oil
2 large eggs
2 tbls ground ginger
2 tsp ground pepper
1 tbls water
1/2 c. mini-chocolate chips
1/4 c. sugar

Combine all ingredients except chocolate chips and sugar. Add chocolate chips. Form 1/2 inch balls and roll in sugar to coat. Place on parchment paper or greased cookie sheet. Bake at 350 degrees for 9 minutes - cookies should be soft and cracked on the top.

Execution:

My friend and I have recently been discussing how to make this from scratch instead of using cake mix, but I kinda like the convenience of it all. I also prefer dark chocolate, so instead of mini-chocolate chips I just cut up a bar and a half of dark chocolate into little bits and use that.

Ingredients:


Note that I forgot to put the eggs on the counter for this picture. I know, I know.

Mix everything but the chocolate bits and the sugar together. It'll be pretty solid once it's done, just squish it all up and make sure there's not big lumps.

Now, I usually use more spices than the recipe calls for. I like my cookies spicy. So in actuality I usually use about 3 tbls of ginger and 2 tbls of pepper. You can try the original recipe or add some more, it's totally up to you.


Then you mush in your chocolate!


I know it doesn't look very different, but there's a bunch of chocolaty pieces in there now.

Now start pulling off bits and rolling them into little balls, maybe an inch across. Don't make them too big because these won't flatten out like normal cookies - they'll bake up, not out. If you make them too big the middle won't cook all the way.

Then roll them in sugar...


..and plop them on a greased cookie sheet. I actually prefer to just grease a bit of tin foil, that way clean-up's easier.


Leave enough space between them to bake. These take practically no time at all - the first sheet will be done before you've finished preparing the second sheet. I find this usually makes about two cookie-sheets' worth of cookies.


All crackly on the outside, warm and gooey on the inside, just a little spicy, extra chocolaty... oh man, these are the best cookies ever!

Thursday, September 17, 2009

Cheesy Corn Chowder

Difficulty Rating:

I'm so full, I can't believe I'm even able to type. Holy crap. I forgot how good this stuff is.

Recipe:

8 large potatoes, peeled and diced
1 small bar of Velveeta cheese (16 oz), cubed
2 cans creamed corn
2 cans sliced carrots
Salt & pepper
Garlic powder

Put potatoes in large pot and add just enough water to cover potatoes. Bring to a boil and cook until soft.

Reduce heat to low. Add cheese in small handfuls and stir to melt. Once melted, stir in corn. Stir in seasonings. Stir in carrots.

Execution:

This is 2 cookies only because Velveeta is usually only found in grocery stores. The hardest thing about this chowder is not making yourself sick eating it. Mmmmm.

Ingredients:


Pretty basic. I usually get an extra can of corn and an extra block of cheese, mainly because potatoes come in different sizes and you may find it's not cheesy enough (add more cheese) or too thick (add more creamed corn).

This is pretty much gonna just be me saying "Add stuff and stir," so I figured I'd spice up the entry a little by showing you what is, in my opinion, the best way to dice potatoes.

(1) Slice in half.
(2) Slice that lengthwise.
(3) Cut that into long slices.
(4) Dice.

This method ensures you always have a flat side down on the cutting board so your potatoes aren't sliding all over the place and endangering your precious fingers under the knife. Illustrated below!


Well that was fun. Another tip: to keep potatoes from browning once you peel them, immediately put them in a bowl of water. Same once you've diced them - exposing them to air is what does it, so just keep 'em in a bowl until you're ready.

And once you ARE ready... throw 'em in a pot and fill with just enough cool water to cover them.


Bring this to a boil, then continue to let boil until the potatoes are soft. This will take less time than you think because they're all chopped up. Just use a fork and try to mush a piece against the side of the pot. If there's no resistance, they're ready!

You can just leave 'em in the pot and turn down the heat. Grab a hand masher (or big slotted spoon if you don't have a masher) and smush the potatoes until you get a slightly chunky, chowder-like consistency.


Kitchen Buddha approves of the potato masher. It totally tickles his chakras.

Add cheese! Do this only a handful at a time because if you dump it all in at once some of the cheese won't melt. Just add, stir it for a little while, then add some more.


Once that's done, pour in the two cans of creamed corn. By now it should be a happy golden color:


I always add my seasonings at this point, since it's easier to taste when you're not fighting to keep carrots off your spoon. I stay pretty basic: salt, pepper, garlic powder. Then I dump in the carrots.


Ta-da! This stuff is seriously not messing around. It's thick, gooey, delicious, and will fill you right up. This is absolutely pants-unbuttoning food. :)

Disclaimer: The Apartment Chef is not responsible for any deaths as a result of overeating any of her recipes. She admits that it is just that damn good, but you knew what you were getting into.

Wednesday, September 16, 2009

Lemon Pasta

Difficulty Rating:

I'm putting this down as a 1 Cookie recipe because it's painfully simple and you probably have everything except the lemons already. There is a bit of a variation on the recipe if you wanna get fancy, but I'll explain that later.

Recipe:

1 lb pasta
2/3 cup grated Parmesan cheese
2/3 cup olive oil (extra-virgin preferred)
1/2 cup fresh lemon juice, about 4 lemons
salt and pepper

Boil the pasta and drain.

Mix remaining ingredients. Pour over pasta. Mix until the pasta is well covered. Serve hot or cold.

Execution:

The thing I love about this recipe is its versatility. This is the most basic version of this recipe, but I will often add other things to it: grilled chicken, sauteed broccoli, fresh diced tomatoes, anything really. It's also delicious both hot and cold, so it's perfect right off the stove or refrigerated and brought to a picnic. Yum!

Ingredients:


No, this is not an ad for Ronzoni, they were just having a sale at Trade Fair. Shut up.

As far as which kind of pasta to use, it really doesn't matter. I've made it with spaghetti, angel hair, rotini, small shells, linguine... really, whatever you like. I find that using something with texture or nooks-slash-crannies (rotini, bow ties, shells, spaghetti rigata) works best because then there's places for the delicious cheesy-lemon sauce to get stuck in.

First step: boil the pasta.


Boil, kitchen Buddha, boil! Use your magic zen kitty dragon rainbow chakra power ding!

Next, juice the lemons. A note on making things easy: I don't have any fancy juicer, I just use a fork and my ten little fin'ers. If you have a juicer that's fine, go crazy. But if not, and you just want to juice them by hand, start by rolling the lemons on the counter.


Just roll them from fingertips to palm, squishing the lemon, and that'll break up some of the pulp and make it easier to get the nummy juice out. Cut 'em in half, then strain the seeds. I usually do this by sticking the collander on top of the measuring cup and juicing it there...


... but you can always just juice 'em into a bowl and pick the seeds out by hand. I do that when I'm feeling too lazy to wash the collander.

Now that you've got your juice, dump the oil and cheese into it. I'm using the basic powdered cheese we all know and love, which will henceforth be known as Shakey Cheese. If you can afford it, go ahead and get a chunk of parmesan and grate it yourself - it's a hundred times better. Not that this isn't delicious, but real parmesan is like a party in your freaking mouth.

Anyway, mix 'em all up. It'll probably still separate a little (for all you scientists out there, this is a suspention mixture) but that's fine, just mix it up again before you pour it. You can add salt and pepper to this mixture or put it on the pasta after you've mixed it all together, it's up to you.


You should be able to do all this and have a beer before the pasta's done boiling. Once it's done, drain it and put it in a big ol' bowl. Then just pour your cheesey-lemon sauce over it.


Just dump it all in, you don't have to do anything special. Then mix it all up so the pasta gets completely coated, and sha-zam! Delicious lemon pasta!


The original recipe for this says that at this point you should add 1/3 cup fresh chopped basil. This is an AWESOME idea and I love doing it. Basil is my favorite fresh herb to use, and it makes it super colorful (because, let's face it, this is kinda monotone, yes?). I just forgot to get basil at the store, so none for me. Also, fresh basil kinda makes this a 2 Cookie Recipe. Anyway, I recommend that if you have access to basil, you throw it in there. You can also try sauted spinach, that's good. I mean, anything that's light and tastes good with lemon and cheese. Experiment, dump it in there, see what happens!

I myself am a lover of cheese, so I always put a bunch of extra cheese in mine.


You can believe, dear reader, that I ate the crap out of that. Mmmmm.

Another update on updates

Things to look forward to this week:

Puerco Pibil
Lemon Pasta
Spaghetti Bolognese (which is non-traditional in that we use whatever's in the fridge)
Cheesy Corn Chowder
Beef Stroganoff
Chocolate Crackle Bitches (which are cookies)

There may or may not be Chicken Picata depending on whether Tim brings over the ingredients or not. That's a little pricey to make, and we used all our grocery money for the previously mentioned stuff. And lots of cheese. Oh man, we got so much cheese.

There's also been some requests for my Rabbit Stew, which I generally only make at Easter; I'm not making it unless someone else buys the meat and wine. That is way beyond my budget to make for a blog. :P

Now that you're all drooling, you have to wait til tomorrow! Haha! By which I mean... someone else already made me dinner.

Tuesday, September 1, 2009

Update about updates

Sorry there hasn't been a recipe yet this week, but the situation is as follows:

(A) I started college this week, and not having gone to college for nearly ten years makes this a sort of monumentally stressed occasion. Plus I just spent half my rent's worth of money on books that are nonreturnable and were unable to be bought used. It's a business, people, don't ever let 'em tell you otherwise.

(B) We haven't gone grocery shopping this week. But we're doing that today.

So expect delicious recipes soon, my loves, and in the meantime try out some of the ones already here!